Instructions for using the WildFireWeb® Content Management System
Galleries
can be added to both standard pages and pages using Slates and Tablets. The process is similar although not identical.
Click the instructions for the type of page you are adding a gallery to
below.
Working with images in a gallery and gallery settings are the same for both types of pages.
Click on the link to watch the video on: Creating a Gallery
Working with images in a gallery and gallery settings are the same for both types of pages.
Click on the link to watch the video on: Creating a Gallery
Adding and Managing Images in the Gallery
Upload images from your computer to your gallery.
When logged in and working on your Gallery page:

1 - Click the "Image Manager" icon in the gallery toolbar to open the Image Manager
Clicking the Image Manager icon opens the "Image Manager". The Image Manager keeps track of all the photos and graphic images you use in your galleries. If this is the first time you are using the Image Manager on a page or if this, the window will be empty.
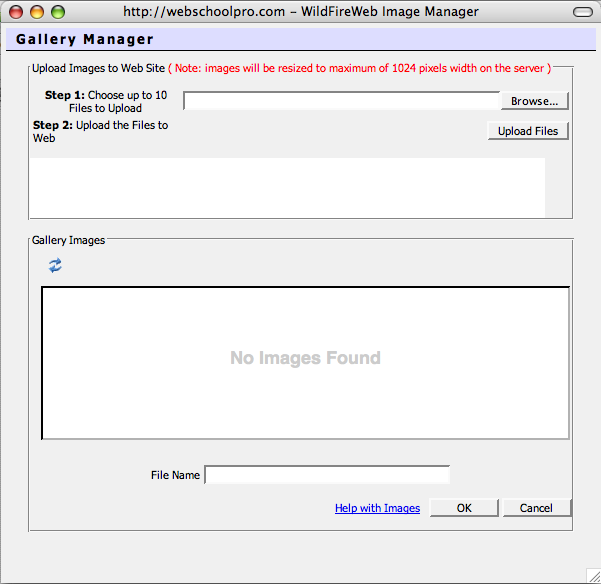
Uploading Images from your computer into the Image Manager
Before you can insert an image into your web page, you must first "upload" them into the Image Manager. You can "Browse" for, and "Upload" most image and graphics files that you have stored on your computer.
3 - To "Browse" for an image stored on your computer, click the Browse button
 .
.
4 - Navigate to the image or graphic file you wish to upload to the Image Manager.
*Note: The Image Manager supports .jpeg, .jpg, .gif and .png file types. Make sure your image is saved as one of these types at 72 dpi before uploading them to the Image Manager.
**In addition, files should be saved at a maximum size (vertically or horizontally) of 1024 pixels. Images larger than 1024 pixels can be uploaded to the Image Manager, but will be automatically resized to a maximum of 1024 pixels.
5 - Select the image file you wish to upload by double clicking on the image file name.
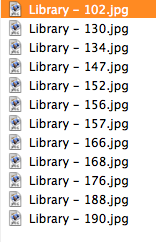
*Note that the file name appears in the list of files to be uploaded. You can Browse for and select up to 10 images to be processed at one time.

Browse and select any additional files to be uploaded (up to 10). *note that each file is added to the list.

*Note: When you have reached the maximum allowed number that can be uploaded at once, the "browse" button becomes disabled.
6 - Click the 'Upload Files" button in the Image Manager window

*Upload times vary depending on the speed of your internet connection and the size of your files. While files are being uploaded, you will see the following messge in the Gallery Manager Window.

When the upload is complete, you see your images in the Gallery Manager window.
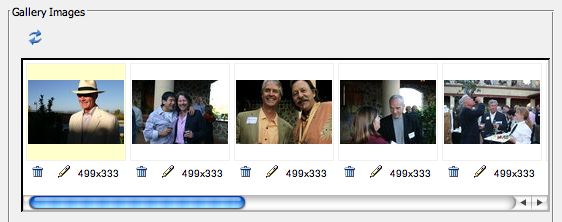
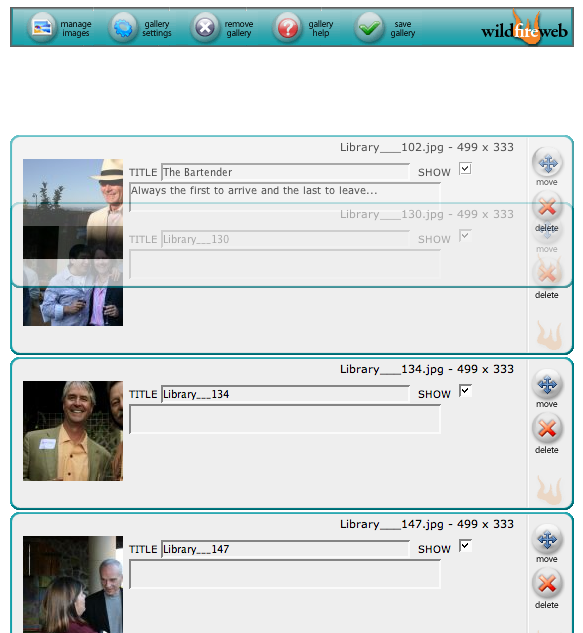
You can now add titles, descriptions, and rearrange the images in your gallery.

Choose to "Show" or not show the image in the gallery by checking or unchecking the Show selection.

Rearrange your images by dragging them up or down using the "Move" tool
(sample image being reordered below)
When you are finished making changes, click the "Save Gallery" button in the gallery toolbar.

You will see the following pop up message as the system saves the changes to your gallery.

To see your Gallery as visitors will see it, click the "Preview" link at the top of your page.

When logged in and working on your Gallery page:
1 - Click the "Image Manager" icon in the gallery toolbar
Clicking the Image Manager icon opens the "Image Manager". The Image Manager keeps track of all the photos and graphic images you use in your galleries. If this is the first time you are using the Image Manager on a page or if this, the window will be empty.
Uploading Images from your computer into the Image Manager
Before you can insert an image into your web page, you must first "upload" them into the Image Manager. You can "Browse" for, and "Upload" most image and graphics files that you have stored on your computer.
3 - To "Browse" for an image stored on your computer, click the Browse button
4 - Navigate to the image or graphic file you wish to upload to the Image Manager.
*Note: The Image Manager supports .jpeg, .jpg, .gif and .png file types. Make sure your image is saved as one of these types at 72 dpi before uploading them to the Image Manager.
**In addition, files should be saved at a maximum size (vertically or horizontally) of 1024 pixels. Images larger than 1024 pixels can be uploaded to the Image Manager, but will be automatically resized to a maximum of 1024 pixels.
5 - Select the image file you wish to upload by double clicking on the image file name.
*Note that the file name appears in the list of files to be uploaded. You can Browse for and select up to 10 images to be processed at one time.
Browse and select any additional files to be uploaded (up to 10). *note that each file is added to the list.
*Note: When you have reached the maximum allowed number that can be uploaded at once, the "browse" button becomes disabled.
6 - Click the 'Upload Files" button in the Image Manager window
*Upload times vary depending on the speed of your internet connection and the size of your files. While files are being uploaded, you will see the following messge in the Gallery Manager Window.
When the upload is complete, you see your images in the Gallery Manager window.
Click the "OK" button at the bottom right corner of the window to continue
![]()
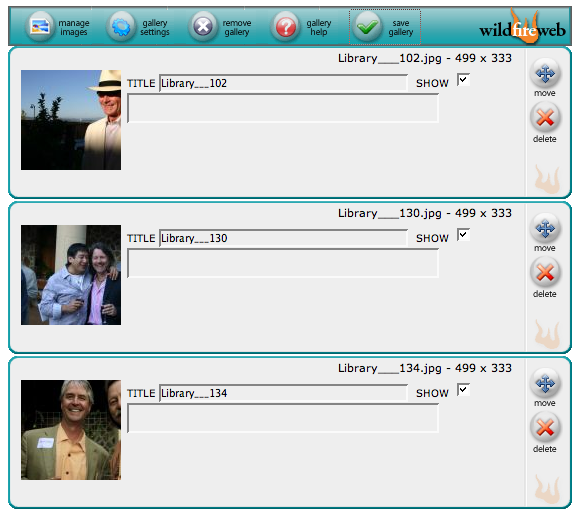
In edit mode, your images appear in list view (as below) with a thumbnail image.
You can now add titles, descriptions, and rearrange the images in your gallery.
Choose to "Show" or not show the image in the gallery by checking or unchecking the Show selection.
Rearrange your images by dragging them up or down using the "Move" tool
(sample image being reordered below)
When you are finished making changes, click the "Save Gallery" button in the gallery toolbar.
You will see the following pop up message as the system saves the changes to your gallery.
To see your Gallery as visitors will see it, click the "Preview" link at the top of your page.
