Instructions for using the WildFireWeb® Content Management System
Resizing Images on the page
Resizing Your Images
Images can be resized two ways.
To resize the image in the editing box:
1) Click in center of the image you wish to resize.To resize the Image Manager using the image manager:
2) Click in one of the corners of the image and drag to new size, up or down.
Note: Image will lose clarity if taken to a larger size than the original .
1) Select the image you wish to edit
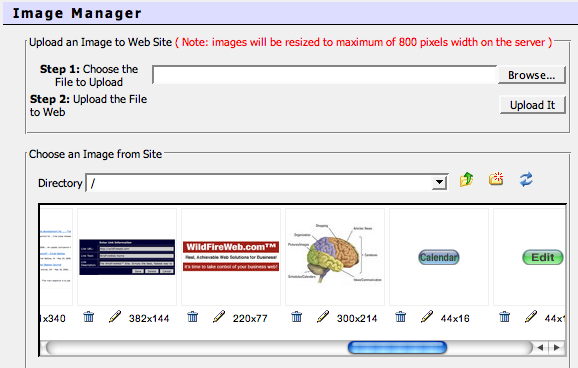
3) Click the "Edit" icon below the image you wish to edit
Clicking the edit icon opens the Image Editor window
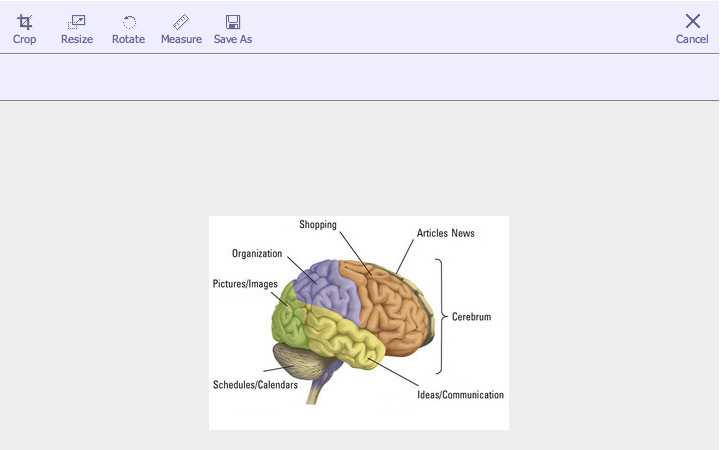
4) Click on the icon of the function you wish to perform from the Image Editor tool bar
(For this example we are using "Resize")
The Image editor displays the current size of your image, in this example, the current size is 300 pixels X 214 pixels
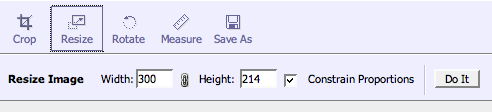
5) Enter the new desired size of the image
(in this example, we set the size to 100 pixels X 71 pixels)
6) Click the "Do It" button to perform the changes
Your new image size appears in the window
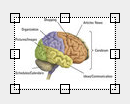
Now you're ready to "Save" your changes
7) Click the "Save As" icon in the Image Editor tool bar
(the image editor performs a Save As rather than a Save, this protects your original image
by leaving it in it's original state, and saves a copy of the image at the new size)

*By default, the image editor renames the original file adding a sequential number to the name of the file
(In our sample, the image brain2.jpg is renamed to brain2_1.jpg) This is done to protect the orignal file. (you can change the name at this point if you desire).
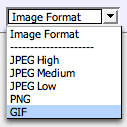
8) Select a desired file type for the image, or leave this setting "as is", to save the file as the same type as the original.
9) Use the slider to adjust the image to the desired "quality"
(higher numbers are better quality but larger files, lower numbers create smaller file sizes which will load faster in browsers)
Now you're ready to save your new image and exit
10) Click "Save and Exit"
You're new image appears in the Image Manager window.
(you may need to scroll to the new image, depending on the number of files in the Image Manager)
If the image is not available immediately, click the 'Refresh" button in the Image Editor.
Your new image is now available and ready to be placed on your page!
