Instructions for using the WildFireWeb® Content Management System
Click on the link to watch the video on: Uploading an Image
1 - Click the 'Edit" icon of the content area you wish to edit.
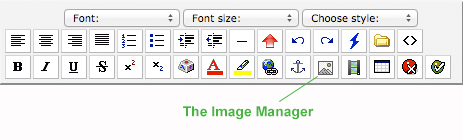
2 - Click the "Image Manager" icon in the editor toolbar to open the Image Manager
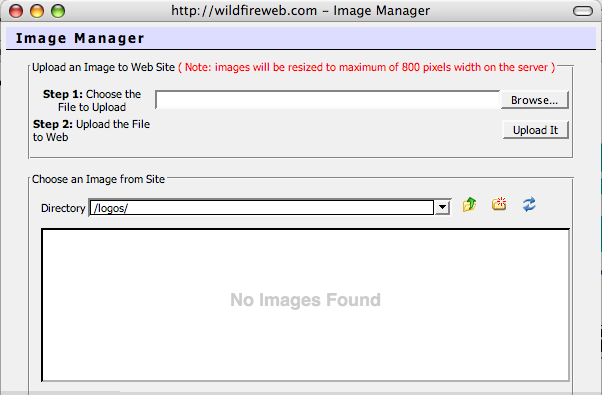
Clicking the Image Manager icon opens the "Image Manager". The Image Manager keeps track of all the photos and graphic images you use in your website. If this is the first time you are using the Image Manager, the window will be empty.
Using Mac or Windows
Summary: Browsing & uploading images from your computer files.
Uploading Images using the Image Manager
1 - Click the 'Edit" icon
2 - Click the "Image Manager" icon in the editor toolbar
Clicking the Image Manager icon opens the "Image Manager". The Image Manager keeps track of all the photos and graphic images you use in your website. If this is the first time you are using the Image Manager, the window will be empty.
Uploading Images into the Image Manager
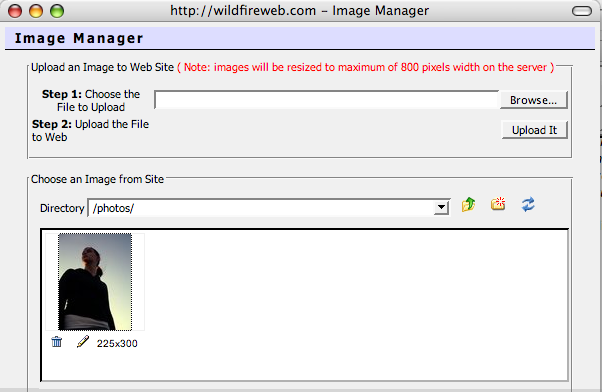
Before you can insert an image into your web pages, you must first "upload" them to the Image Manager. You can "Browse" for, and "Upload" any images and graphics that you have stored on your computer using the Image Manager.
3 - To "Browse" for an image stored on your computer, click the Browse button
 .
.
4 - Navigate to the image or graphic file you wish to upload to the Image Manager.
*Note: The Image Manager supports .jpeg, .jpg, .gif and .png file types. Make sure your image is saved as one of these types at 72 dpi before uploading them to the Image Manager.
**In addition, files should be saved at a maximum size (vertically or horizontally) of 1024 pixels. Images larger than 1024 pixels can be uploaded to the Image Manager, but will be automatically resized to a maximum of 1024 pixels.
5 - Select the image file you wish to upload by double clicking on the image file name.
6 - Click the 'Upload It" button in the Image Manager window

*Upload times vary depending on the speed of your internet connection. Once your file has been uploaded, it appears in the Image Manager window.
Before you can insert an image into your web pages, you must first "upload" them to the Image Manager. You can "Browse" for, and "Upload" any images and graphics that you have stored on your computer using the Image Manager.
3 - To "Browse" for an image stored on your computer, click the Browse button
4 - Navigate to the image or graphic file you wish to upload to the Image Manager.
*Note: The Image Manager supports .jpeg, .jpg, .gif and .png file types. Make sure your image is saved as one of these types at 72 dpi before uploading them to the Image Manager.
**In addition, files should be saved at a maximum size (vertically or horizontally) of 1024 pixels. Images larger than 1024 pixels can be uploaded to the Image Manager, but will be automatically resized to a maximum of 1024 pixels.
5 - Select the image file you wish to upload by double clicking on the image file name.
6 - Click the 'Upload It" button in the Image Manager window
*Upload times vary depending on the speed of your internet connection. Once your file has been uploaded, it appears in the Image Manager window.
Your image is now available to be used on any of your pages in your site.
